Make a Basic VR Body in Unreal Engine 4 with Power IK Plugin
Making a high-quality full VR body is no simple task. This post will go over the basics to get you setup, but make no mistake that for most use games, this will be a foundation to be built upon. This particular implementation will take advantage of the Power IK plugin and was tested on Unreal Engine 4.24, and targets the default UE4 Mannequin skeleton (and thus any associated skeletal meshes). Note that this is a paid plugin as of May 21st, 2020.
After installing the plugin to UE 4.24, download the example project listed on the plugin's marketplace listing page. Within this project, there exists a 3-point tracking body. Navigate to this class's associated animation blueprint, then to the animation blueprint's animation graph. Duplicate this animation blueprint to work off of; all the work we do in this post will be in this new animation blueprint.
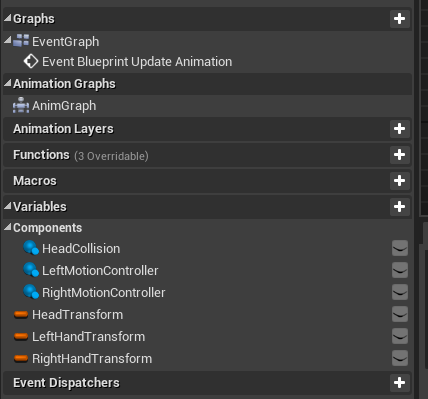
In your animation blueprint, you will need 3 variables: HeadTransform, LeftHandTransform, and RightHandTransform (I also have some for the motion controllers and a head sphere component to simplify null checks).
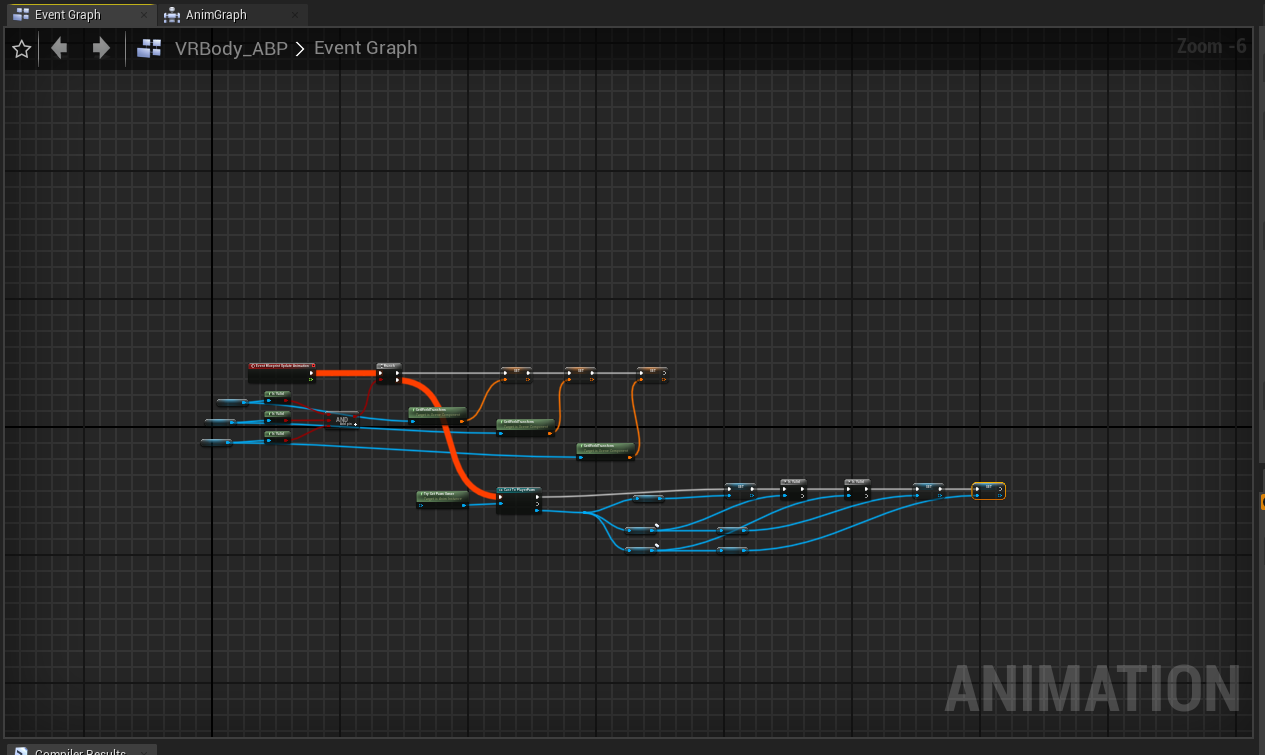
With the proper variables in place, we'll move on to the event graph of the animation blueprint. You'll want to clear out whatever existing nodes were duplicated from the original event graph and tailor this to your particular project, with the end goal being to store the location/rotation data from your HMD and motion controllers. Here's an overview of the event graph that I set up:
This first set of nodes involves performing null checks on the associated components used for head and hand tracking:
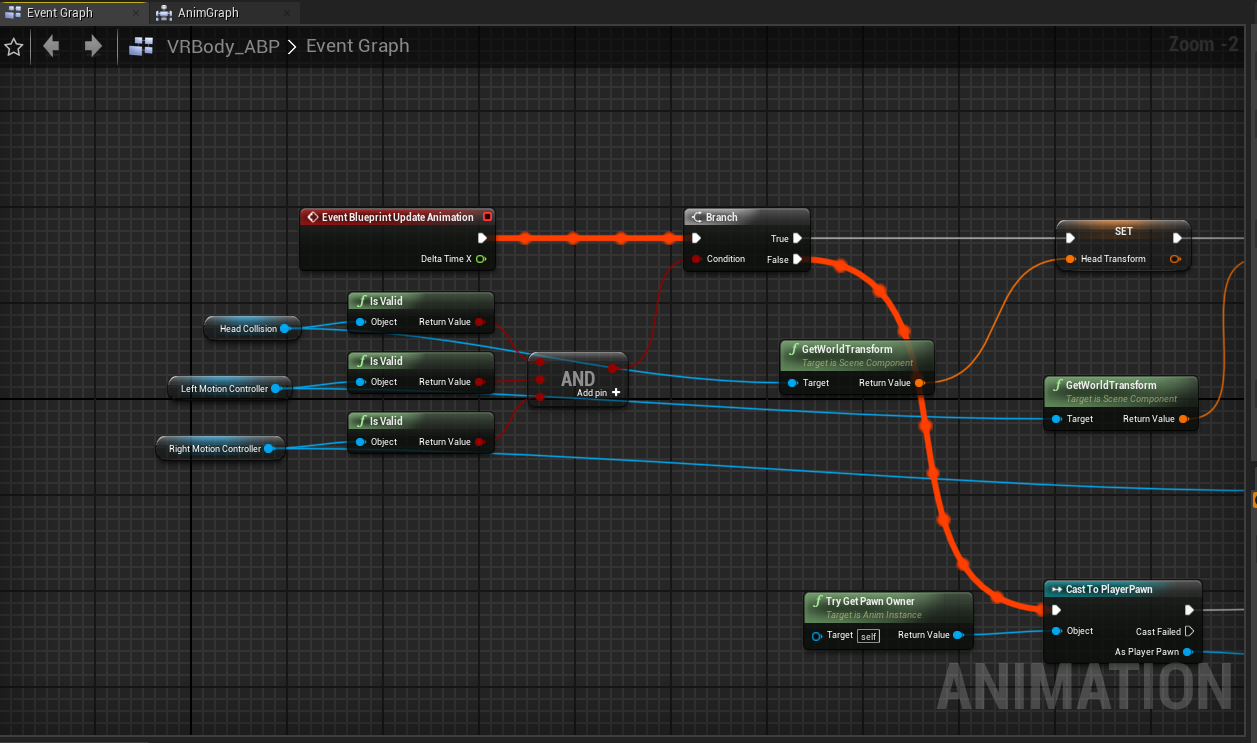
The next set of nodes is setting the head and hand transform values from said components:
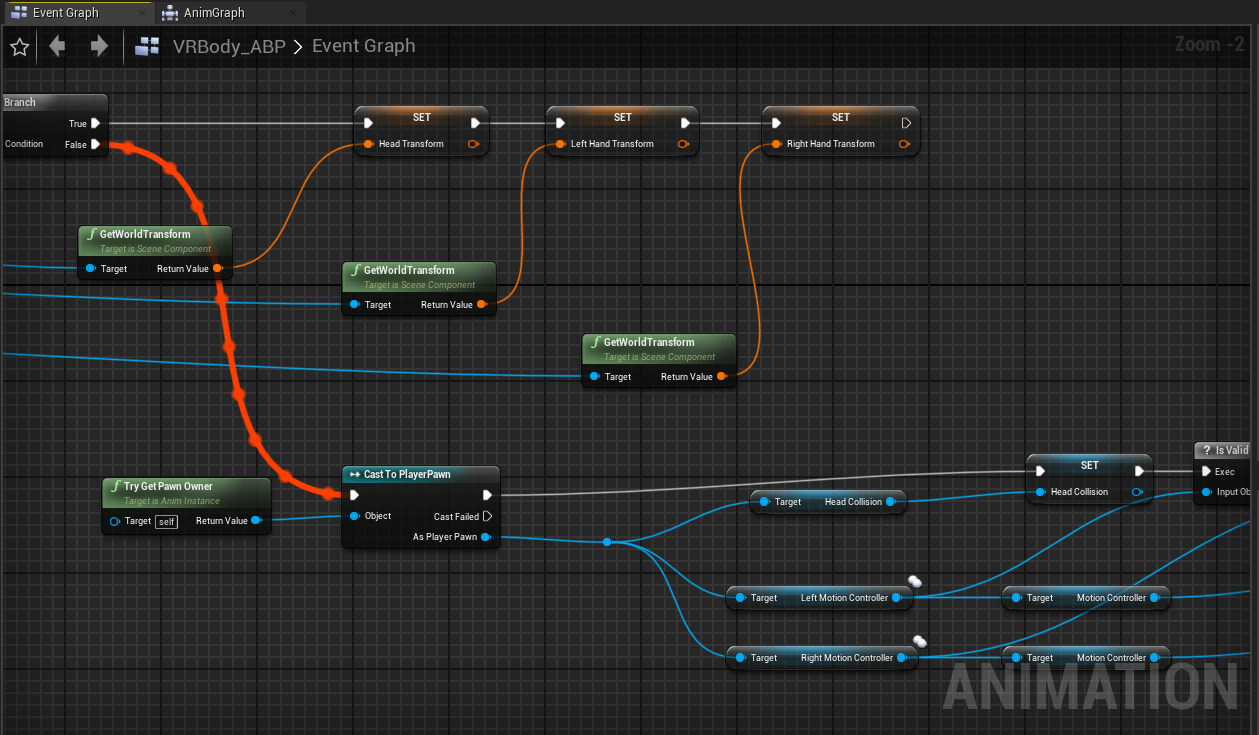
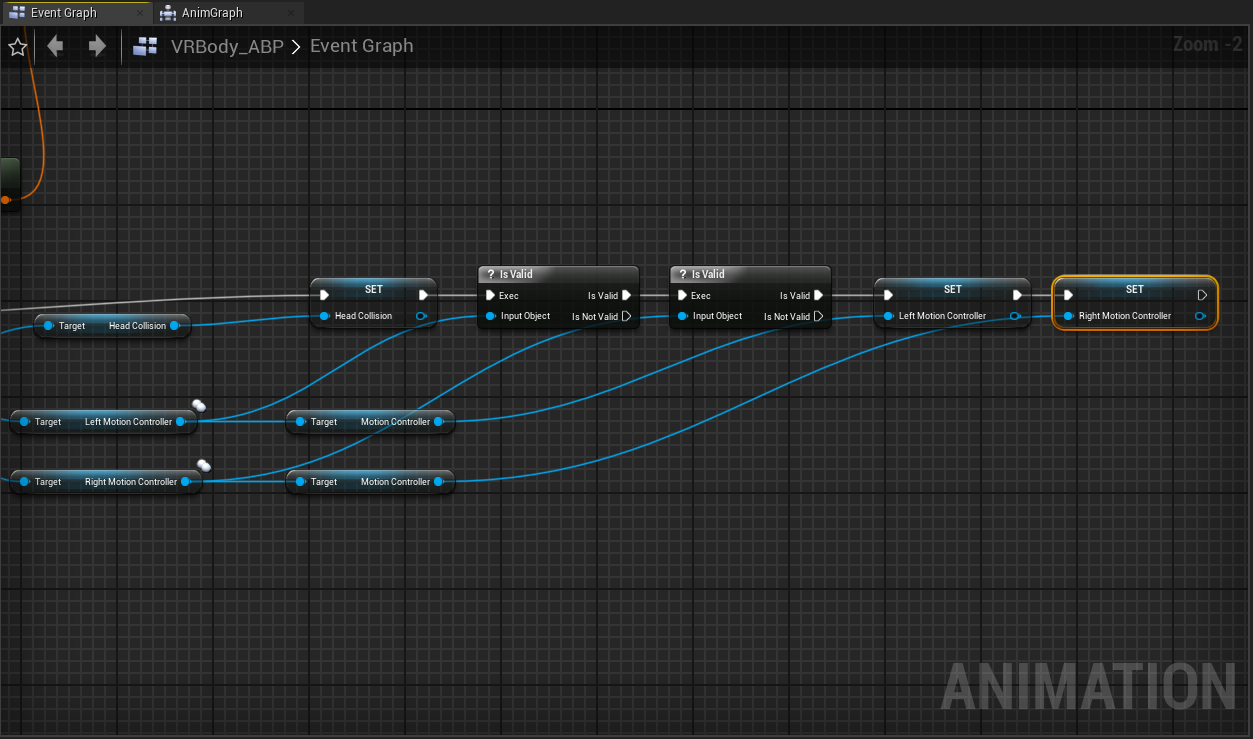
The last set of nodes performs validity checking and sets the motion controllers & head components from the cast pawn owner reference:
That does it for the event graph! Now we move on to the animation graph:
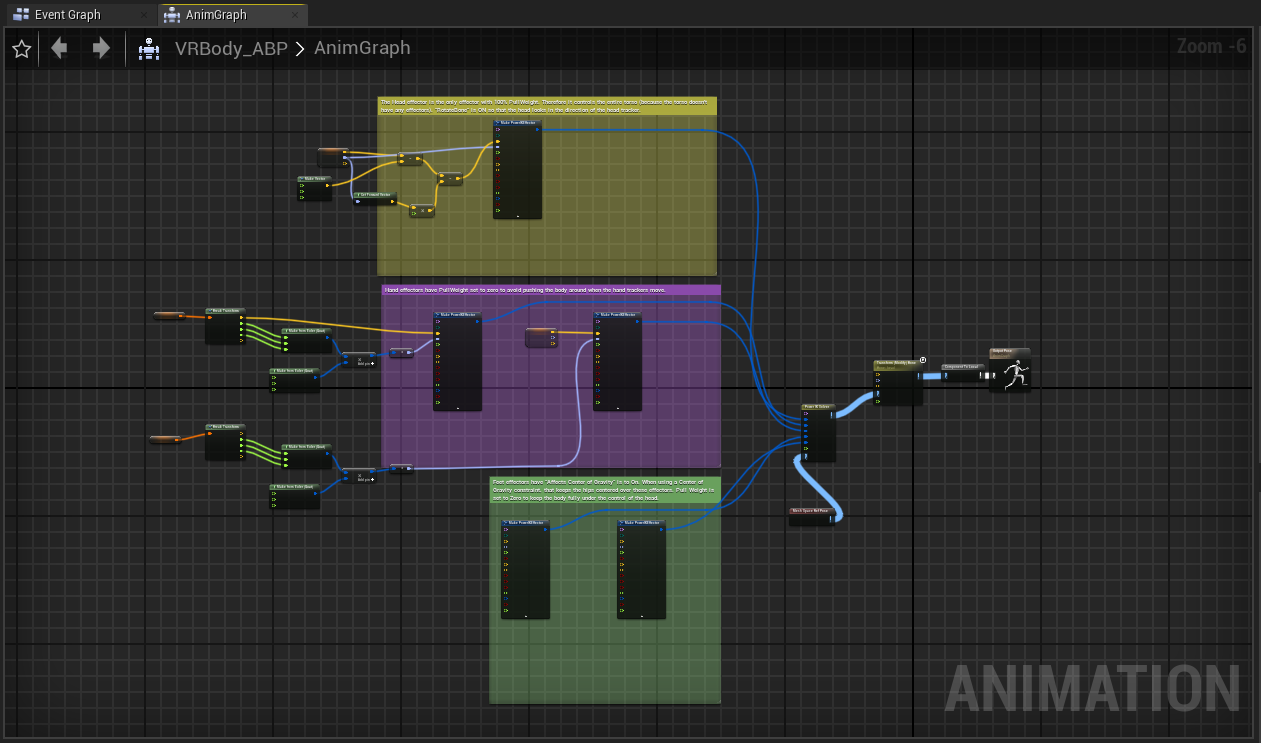
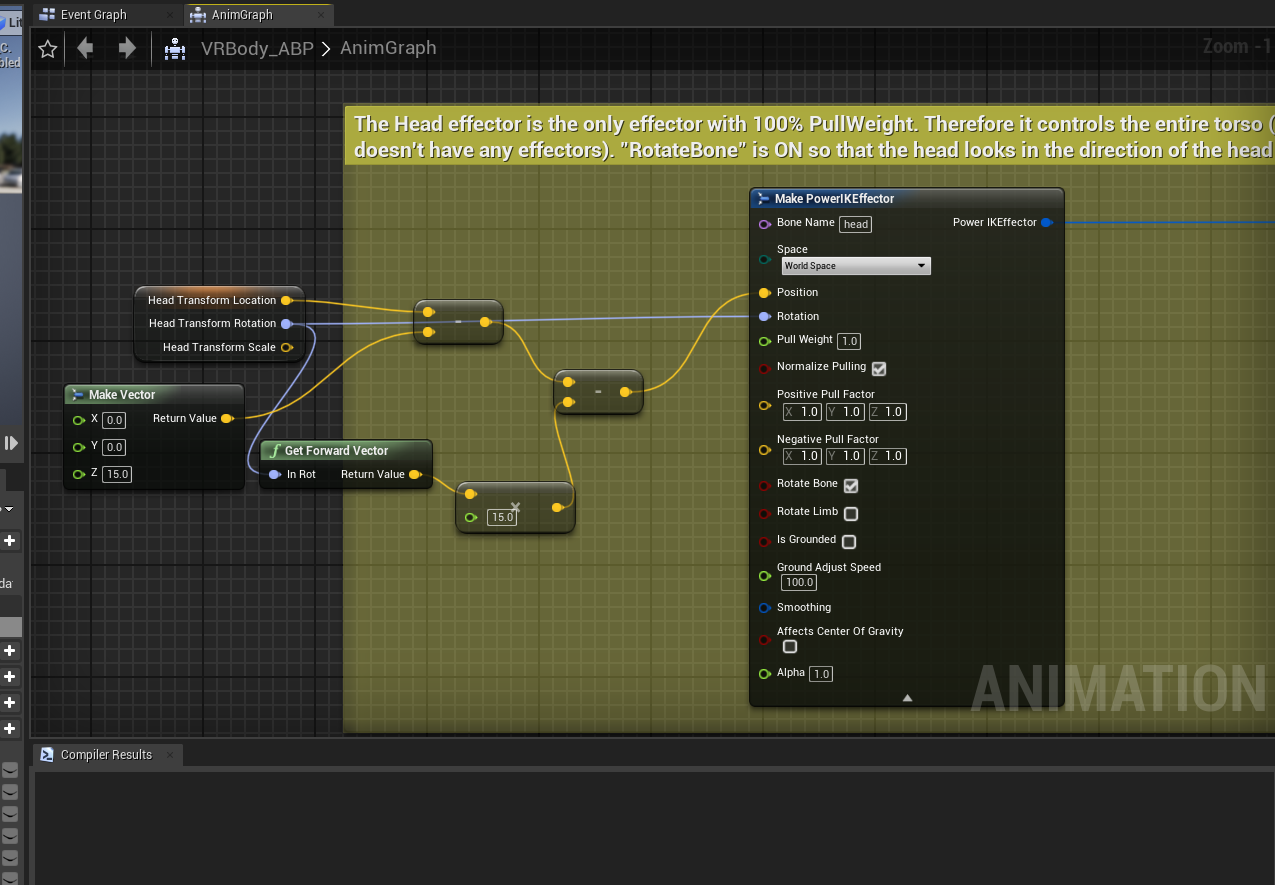
Notice, it's very similar to the animation graph that we originally duplicated. We just need to remove some existing connections and tie them together with our head and hand transform variables. The updated head effector node:
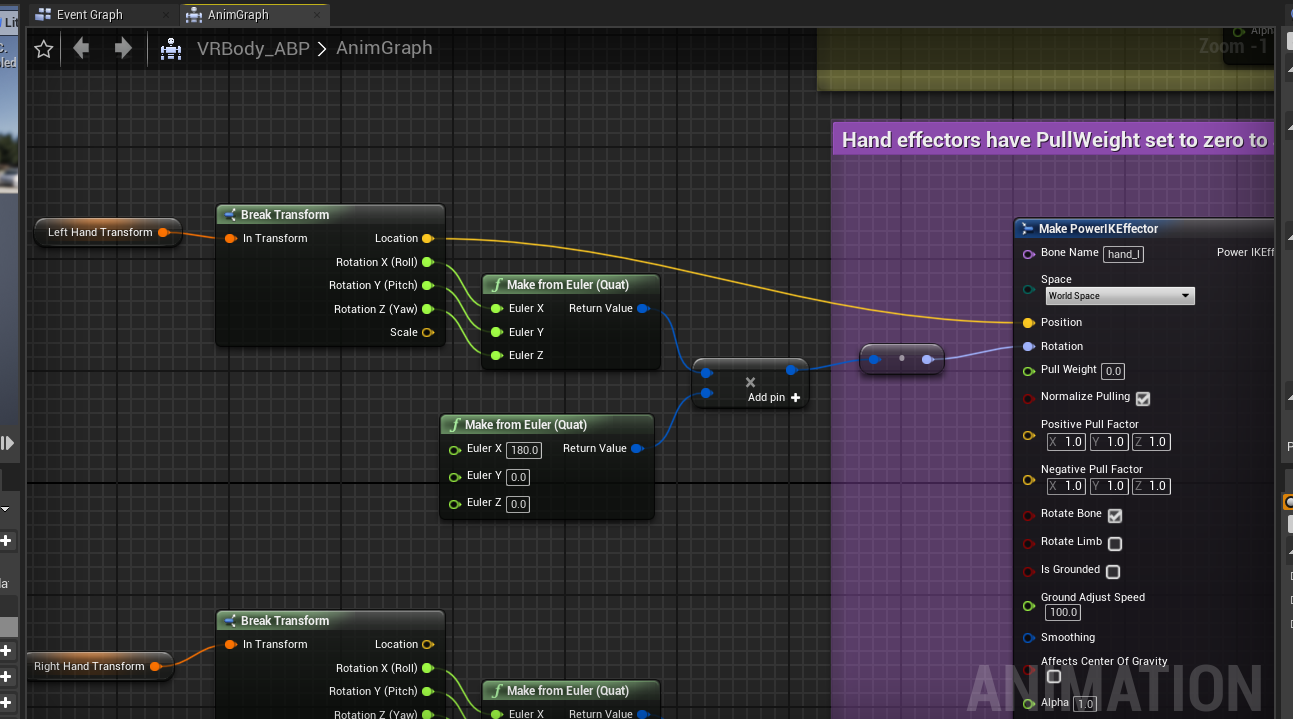
Left hand effector node:
Right hand effector node (rotation data shown here, the rest of the connectors mirror the left hand connectors):
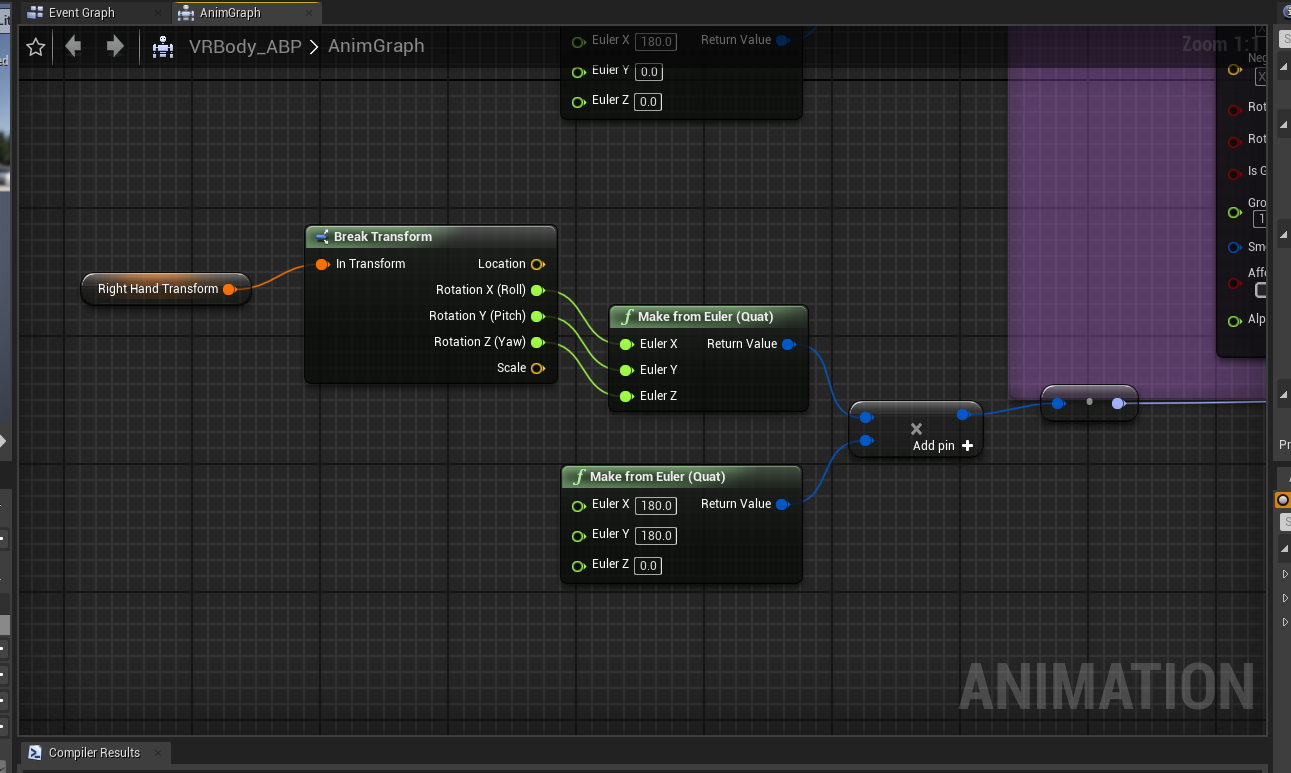
(Take note of the use of World Space in the effector nodes for the head and hands. If you have a similar data pipeline for getting data from the head and hands as me this is likely what you want for these nodes)
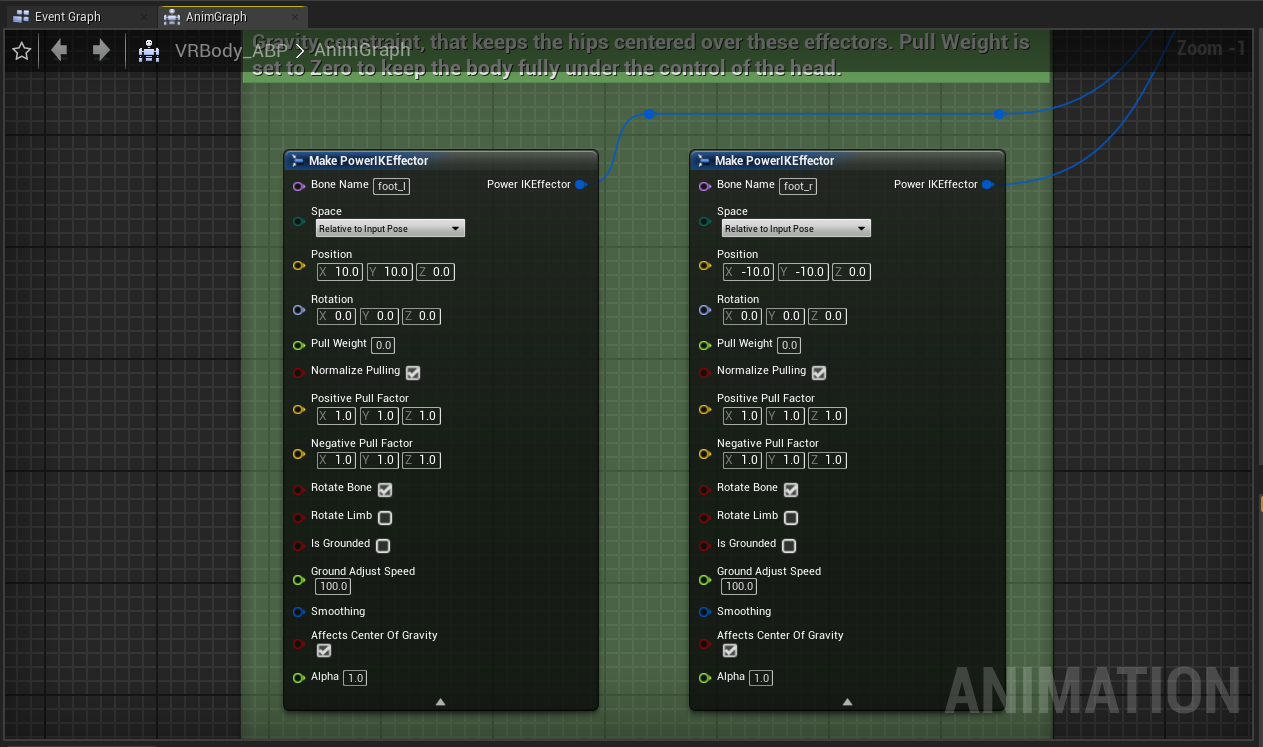
The feet effector nodes:
With all these nodes in place, the rest of the animation blueprint should be kept the same as it was in the original animation graph.
Quick additional tip- using the "Transform Bone" node in your animation graph to scale the "head" bone down to 0 is an easy way to take the head off your skeletal mesh for testing to make sure your body looks solid.
And with that, your body should be ready! Set your new animation blueprint on your skeletal mesh component in your base character class, hook up your Oculus Rift or HTC Vive headset and motion controllers, and witness the fruits of your labors!